Managing Subscription Groups
ShoutCMS provides support for multiple subscriptions. While most sites will typically only require one newsletter signup group, there may be situations when multiple subscriptions may be appropriate. For instance, you might want to market a couple of different types of products which appeal to unique interests. As a result, your customers may want to receive newsletters about one product but not the other.
CASL legislation requires that contacts be provided the opportunity to easily opt-out from receiving marketing related emails. However, there may be circumstances when it is necessary override an opt-out request for other reasons. The mass mail function allows for this at the time an email distribution is sent.
Improving the Unsubscribe Process
Whenever you create and send out a mass mailing from ShoutCMS, an unsubscribe link is automatically added to the end of the content. When a contact receives the email and clicks on the link, the ShoutCMS website contact database is immediately updated to set the client's subscription status to "unsubscribed". A simple acknowledgement screen saying "Unsubscribed Successfully" is then displayed to the user.
While this process allows a contact to easily opt-out of an email subscription, it doesn't provide much direct feedback to either the contact or the site owner. And there is no easy option for the contact to re-enable their subscription if they happened to click on the link by mistake.
User Experience
The following procedure will greatly enhance the unsubscribe functionality and the user experience with the addition of a couple of forms and pages.
- The contact receives a mass email and clicks on the "unsubscribe"
link. In most cases, if they want to opt-out of receiving any future
mailings, they will explicitly click on the link. However, there may be
circumstances where they click on it unintentionally.

- In either case, the contact's subscription status in the ShoutCMS contact database is immediately set to "unsubscribed".

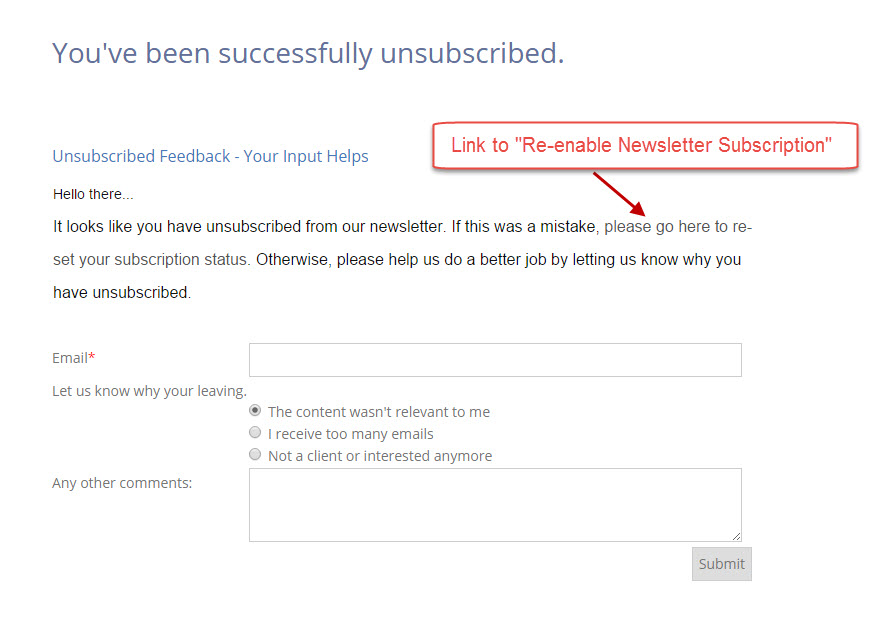
- In place of a simple acknowledgement screen, the contact is now directed to a page containing a "Newsletter Unsubscribe" form.
This form consists of a text field to capture the contact's email
address (a required field) and additional fields to gather data about
why the contact chose to unsubscribe. A link to a "Re-enable Newsletter Subscription" page is included so the contact can reset their subscription if they clicked the unsubscribe link unintentionally.

- Once the form is submitted, the contact is directed to a Thank You page with an option to reset their subscription...

- The form data is added to the ShoutCMS database...

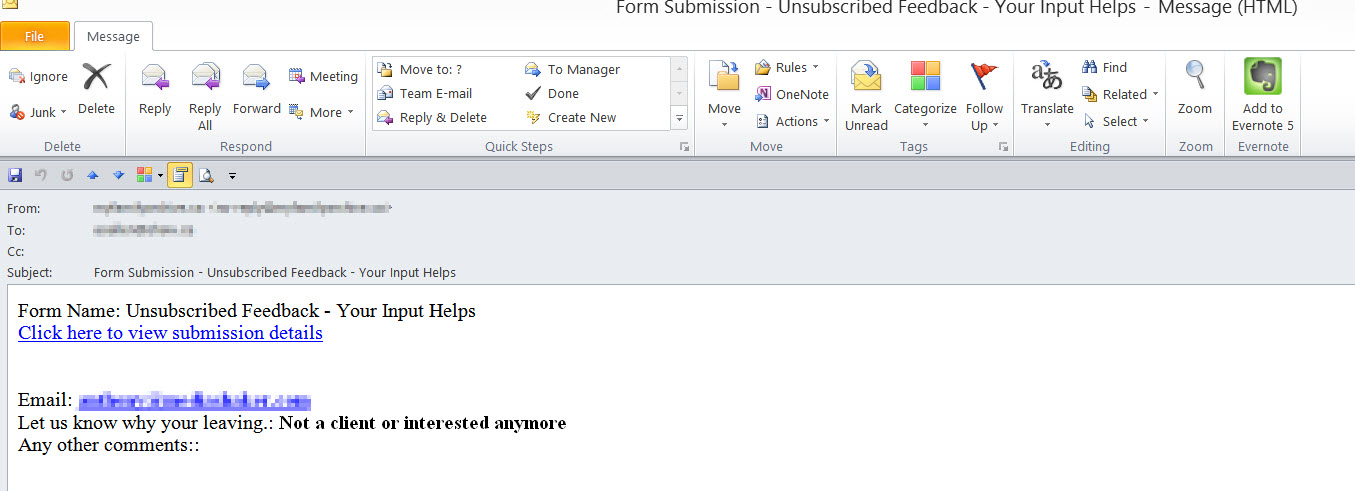
- An email containing the form submission data is sent to the site administrator...

- If the contact clicks the link to re-enable their subscription on either the "Newsletter Unsubscribe" form or on the Thank You page, they will be directed to the "Re-enable Newsletter Subscription"
page. It contains a simple form consisting of an explanation of their
options and a Contact Registration Fieldset form element asking for the
contact email address.
Note: If more than one subscription group has been created, then a separate "Re-enable Newsletter Subscription" page and associated form should be configured for each distinct subscription group (most sites will only have one).
The contact enters their email address and submits the form...

- Once the form is submitted, the contact is shown a thank you page...

- The contact subscription status is reset to "subscribed" in the ShoutCMS database...

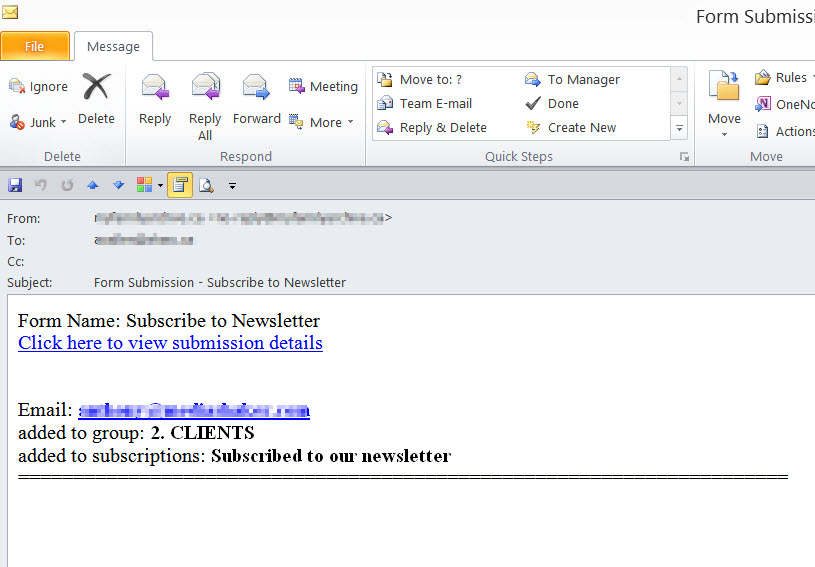
- An email containing the form submission data is sent to the site administrator...

- And a
confirmation email is sent to the contact acknowledging the reset.

Setup and Configuration of Pages and Form Templates
- Create a newsletter unsubscribe form. In this example, it is titled "Unsubscribed Feedback - Your Input Helps".

- Create a "Re-enable Newsletter Subscription" Form

- Create a "Newsletter Unsubscribe" page. Be sure that the Search Engine Friendly URL is set to "newsletter-unsubscribe". Place the page under the Site Misc page. Set security to "Available to Public". Set the page to "Hidden". Under Additional Page Settings > Append a Form select the newsletter unsubscribe form that you created. Save the page.
- Create a "Re-enable Newsletter Subscription" page. Place the page under the Site Misc page. Set security to "Available to Public". Set the page to "Hidden". Save the page.
- Thoroughly test the settings to insure process is working.
Conclusion
While it is certainly convenient for the site owner to receive immediate email notifications of changes in subscription status, there a tremendous opportunity to gain additional insight into customer needs and behavior by downloading and analyzing the collected submission data and this should not be overlooked.
