Outlook Express Email Setup
Overview
This article explains how to configure Microsoft Outlook Express to work with your ShoutCMS email account.
Step 1: Add the e-mail account
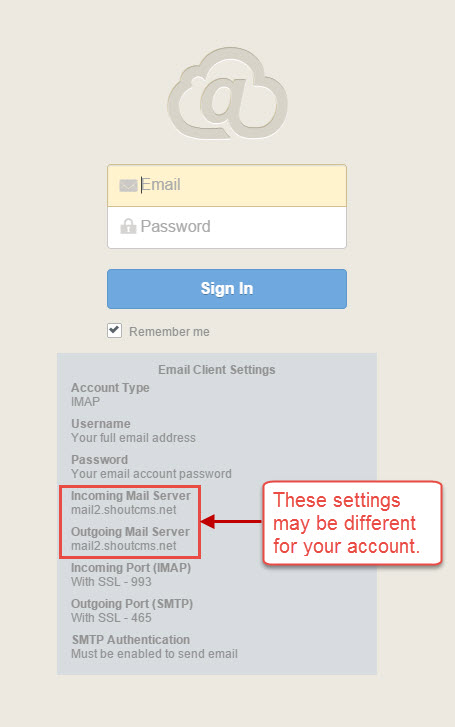
- Using a web browser, navigate to your webmail landing page at http://webmail.yourdomain.com where "yourdomain.com" is the name of your website. Make note of the name of your Incoming and Outgoing Mail Servers (e.g. mail4.shoutcms.net).

- Start Outlook Express. If Outlook Express is not your default e-mail client, you may be prompted to specify if you want to use Outlook Express as your default e-mail client. To select Outlook Express as your default e-mail client, click OK.
- If you are prompted to type your name in the Display name box, click Cancel, and then click Yes when you receive the following message: The new Internet account has not been created yet. Are you sure you want to exit the wizard?
- In Outlook Express, click Accounts on the Tools menu.
- Click Add, and then click Mail.
- In the Display name box, type your name as you want it to appear on your outgoing e-mail messages, and then click Next.
- In the E-mail address box, type your e-mail address. For example, type user@yourdomain.com.
- Click Next.
- In the My incoming mail server is a list, choose IMAP.
- In the Incoming mail (POP3, IMAP, or HTTP) server box, enter your Incoming Mail Server (noted from step 1).
- In the Outgoing mail (SMTP) server box, enter your Outgoing Mail Server (noted from step 1), and then click Next.
- In the Account name box, type your full email address.
- In the Password box, type your email password.
- If you want Outlook Express to save your password, leave the Remember password check box selected.
- Click Next, and then click Finish.
Step 2: Configure the e-mail account
After you add the e-mail account, you must configure this account in Outlook Express. To do this, follow these steps:
- When you return to the Internet Accounts dialog box after you complete the steps from the "Step 1: Add the e-mail account" section, click the Mail tab. Note If the Internet Accounts dialog box is not open, click Accounts on the Tools menu.
- On the Mail tab, click the e-mail account that you added, and then click Properties.
- Click the Servers tab, and then click to select the My server requires authentication check box.
- Click Apply, and then click the Advanced tab.
- In the Outgoing mail (SMTP) box, type 465. (Note By default, the SMTP port number is 25).
- Click Apply, and then click OK.
- Click Close. If you receive the following message (Would you like to download folders from the mail server you added?) click Yes

Questions?