Outlook 2010 and 2013 Email Setup
Overview
This article explains how to configure a ShoutCMS email account in Microsoft Outlook versions 2010 and 2013. Differences between the two versions are noted.
Add and configure the e-mail account
- Using a web browser, navigate to your webmail landing page at http://webmail.yourdomain.com where "yourdomain.com" is the name of your website. Make note of the name of your Incoming and Outgoing Mail Servers (for example, mail4.shoutcms.net).
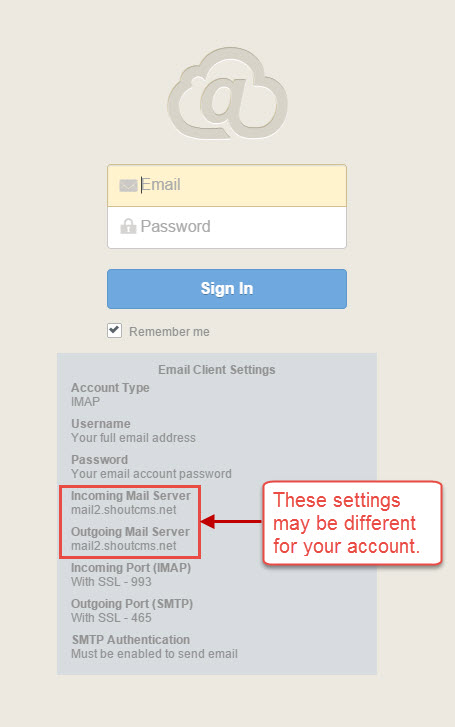
- Start Outlook and click on the File tab.

- On the File menu, click Add Account.
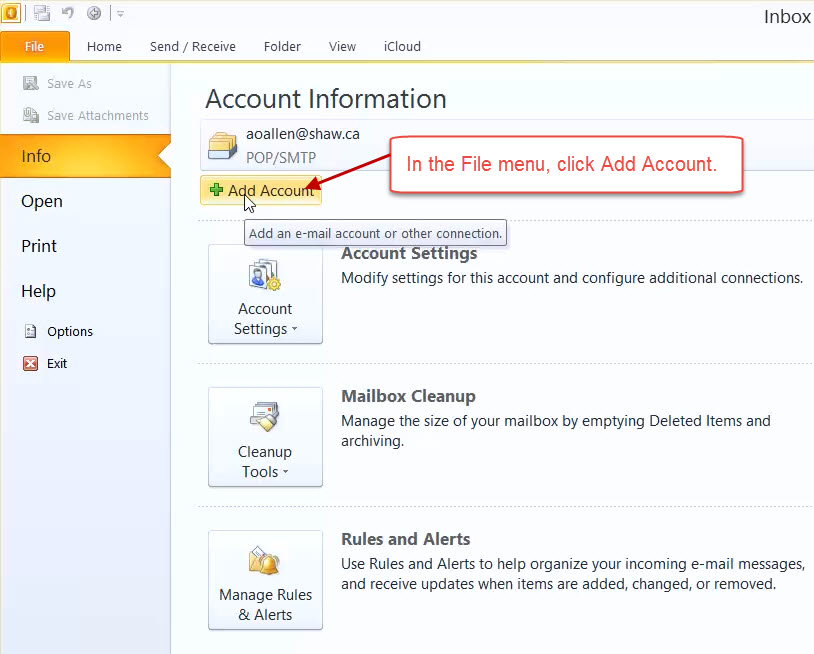
- In the Add New Account dialogue box, select Manually configure server settings or additional server types and click Next.
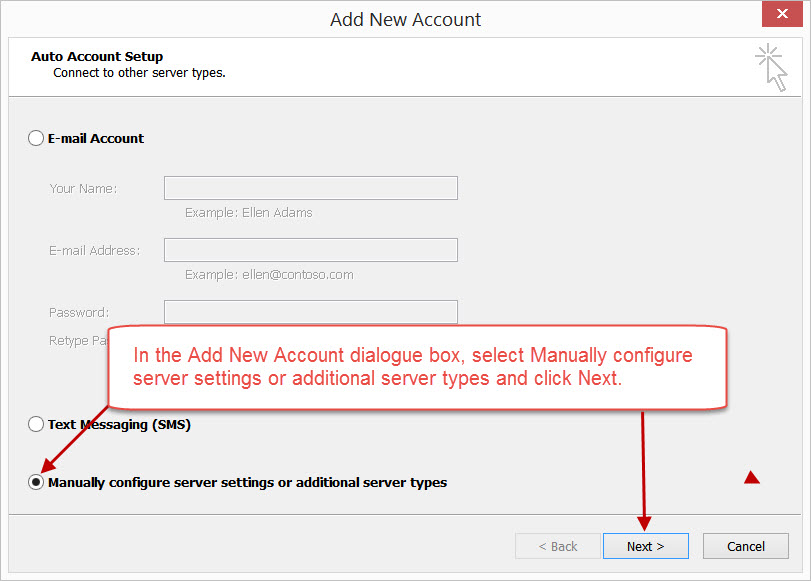
- Choose Service "Internet E-mail" (Outlook 2010) or "POP or IMAP" (Outlook 2013) and click Next
Outlook 2010
Outlook 2013
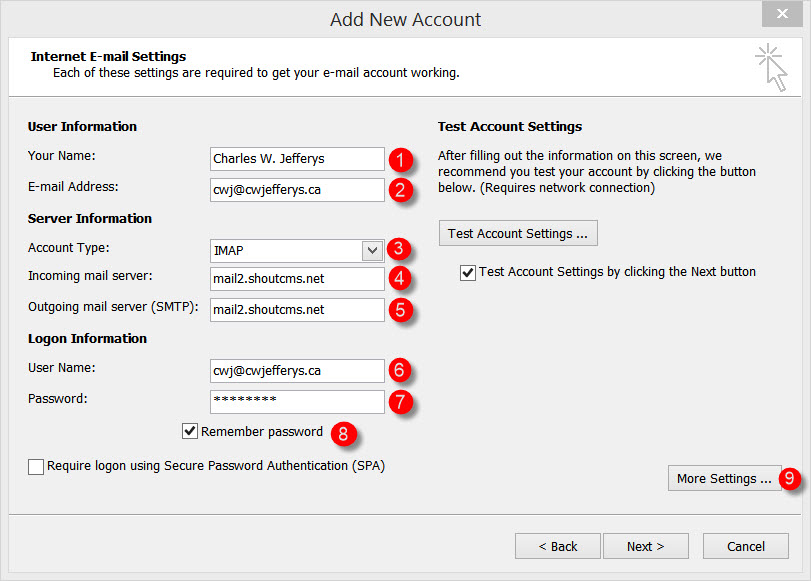
- Under Internet E-mail Settings, configure the following:
- User Information > Your Name, enter your full name.
- User Information > E-mail Address, enter your full e-mail address.
- Server Information > Account Type, select IMAP
- Server Information > Incoming mail server, enter the name of your incoming mail server (noted from step 1)
- Server Information > Outgoing mail server (SMTP), enter the name of your outgoing mail server (noted from step 1)
- Logon Information > User Name, enter your full email address.
- Logon Information > Password, enter the email account password.
- If you want Outlook to remember your e-mail account password, click to select the Remember password check box. If not, you will need to enter your password every time you log onto Outlook.
- Click the More Settings button to open the Internet E-mail Settings dialog box.
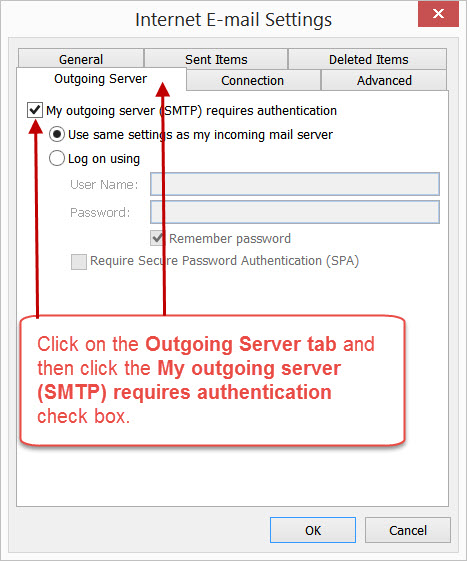
- Click on the Outgoing Server tab and then click the My outgoing server (SMTP) requires authentication check box.
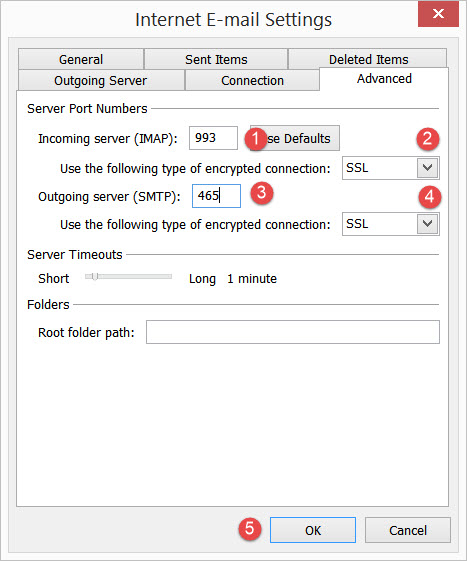
- Click the Advanced tab.
- In the Incoming Server (IMAP) box, enter server port number 993
- Use the following type of encrypted connection: select SSL
- In the Outgoing mail (SMTP) box, enter server port number 465.
- Use the following type of encrypted connection: select SSL
- Verify that both server port numbers are correct and click OK
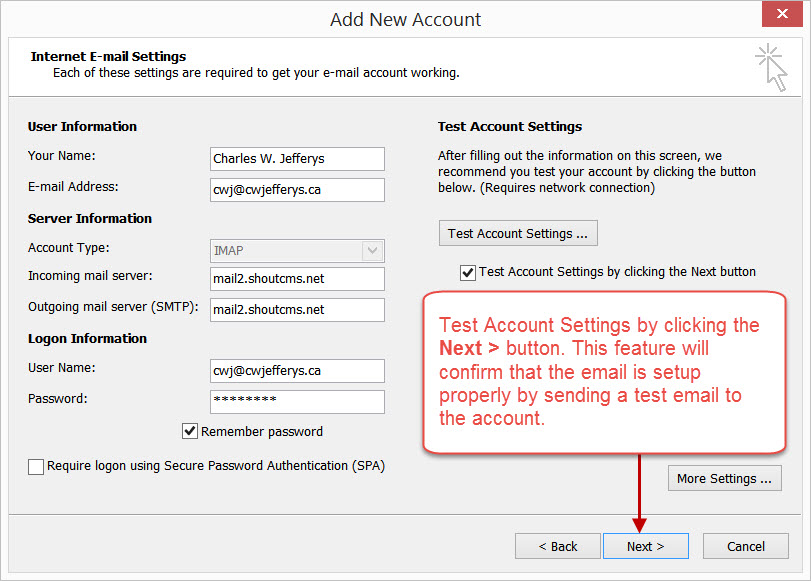
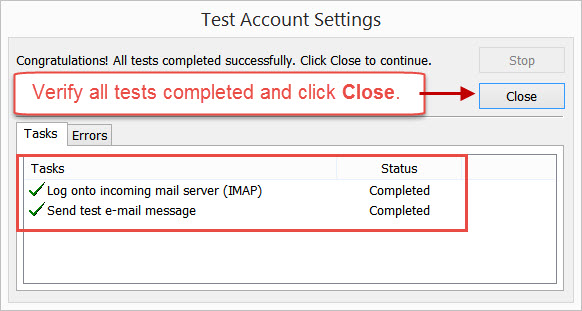
- Test Account Settings by clicking the Next > button. This feature will confirm that the email is setup properly by sending a test email to the account.
- Verify all tests complete and click Close.
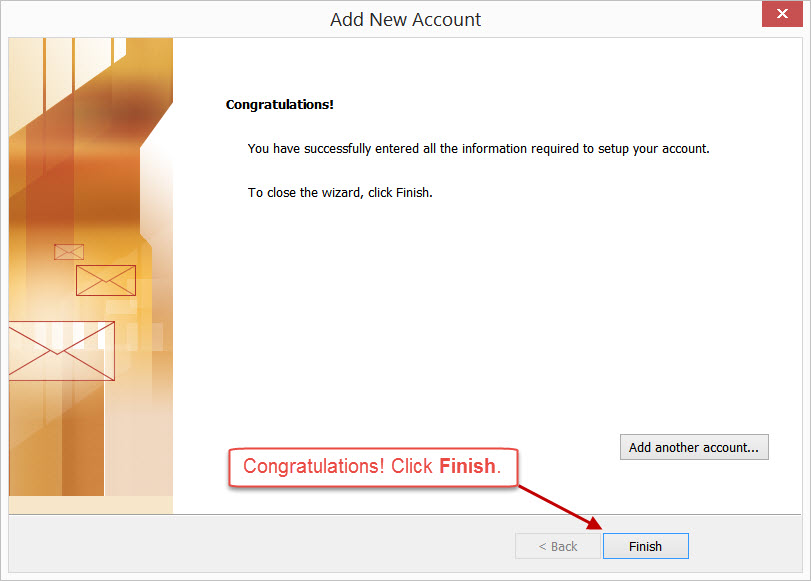
- Congratulations! Click Finish.

Questions?