iPhone or iPad Email Setup
Overview
This article explains how to configure a ShoutCMS email account on an Apple iPhone or iPad
Add and configure the e-mail account
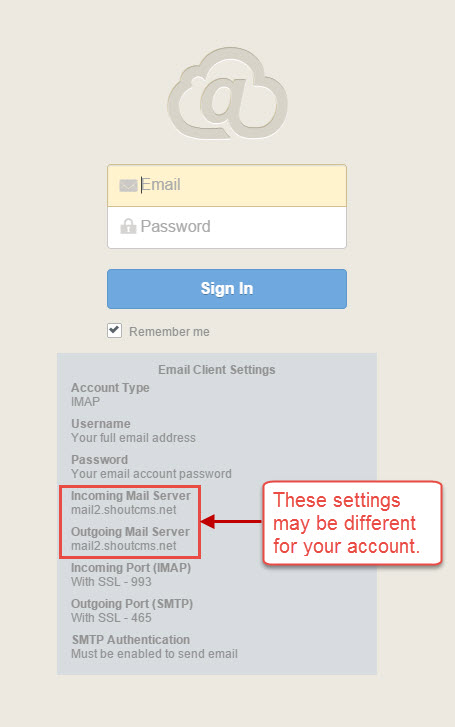
- Using a web browser, navigate to your webmail landing page at http://webmail.yourdomain.com where "yourdomain.com" is the name of your website. Make note of the name of your Incoming and Outgoing Mail Servers (for example, mail4.shoutcms.net).
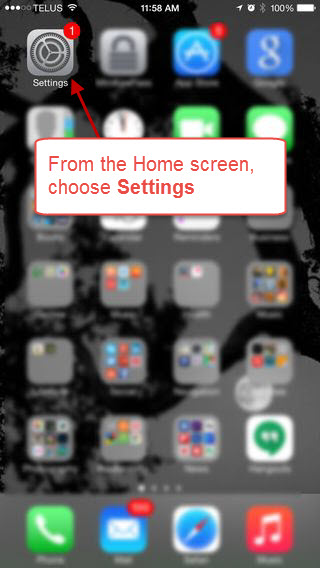
- From the Home screen, choose Settings
- From the Settings screen, choose Mail, Contacts, Calendars

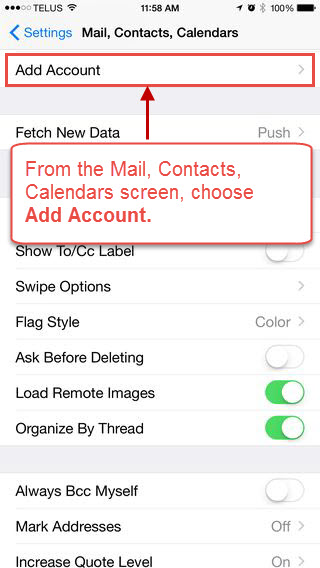
- From the Mail, Contacts, Calendars screen, choose Add Account.
- Choose the email account type - Other.

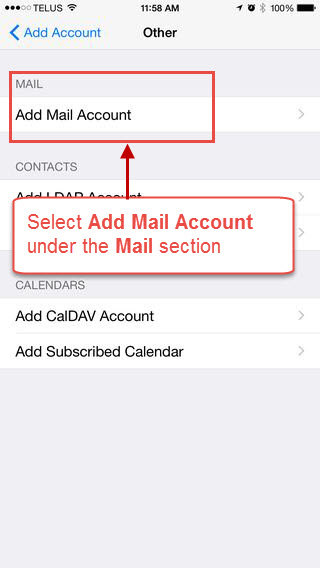
- Select Add Mail Account under the Mail section
- You will be taken to this screen...
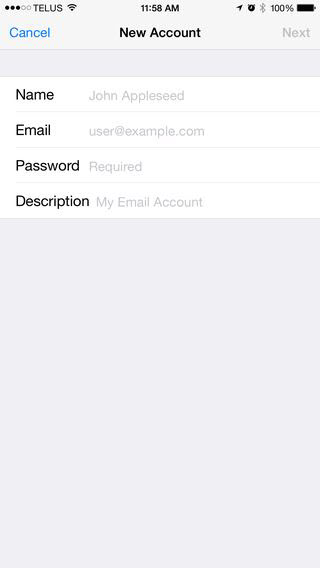
- Enter your name, email address, password and description. Then click Next.
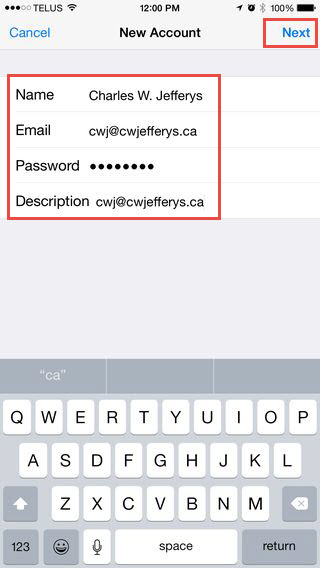
- Select IMAP as the account type

NOTE: Even though iOS labels Outgoing Mail Server fields as Optional, our email servers require them to send email.
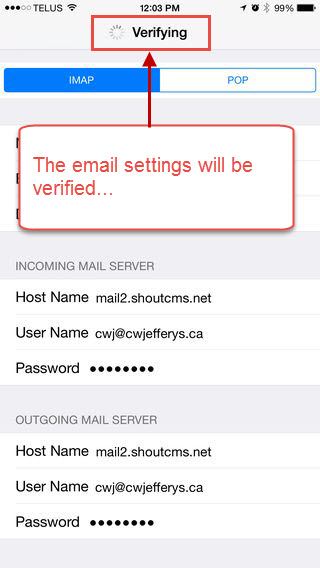
- Enter the Incoming and Outgoing Server details:
- Incoming mail server Host Name: Enter your Incoming Mail Server (noted from step 1)
- Incoming mail server Username: Enter your E-mail address.
- Incoming mail server Password: Enter your Email Password
- Outgoing Mail server Host Name: Enter your Outgoing Mail Server (noted from step 1)
- Outgoing Mail server Username: Enter your E-mail address
- Outgoing Mail server Password: Enter your Email Password
- Tap Next to save the entered information.

- The email settings will be verified...
- Select the Save button.
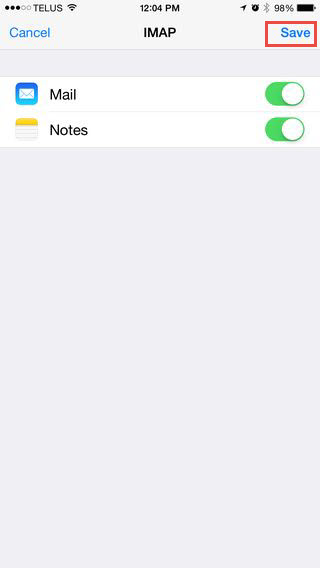
Your email is now configured. Test the settings by sending your self an email and replying to it.
NOTE: Once you've created a new IMAP email account on your iPhone, you may receive the following message: "Unable to move message. The message could not be moved to the mailbox trash." To delete or move emails without this message appearing, follow the instructions listed below.
To Delete or Move IMAP Emails on iPhone
- Press the Home button on your iPhone and choose Settings.
- On the Settings screen, tap Mail, Contacts, Calendars.
- Click on your email account (it should display an arrow to the right of the email address.)
- Scroll down and click Advanced.
- Tap the empty IMAP Path Prefix.
- Enter INBOX (in capital letters), then click Account (top left) and click Done (top right) to save settings.
- Tap the Home button and then reopen email.
You will now be able to delete or move emails without an error message appearing!

Questions?