Creating Company Email Accounts
General Description:
If your ShoutCMS hosting plan includes email and your site is running ShoutCMS Version 6.0 or greater, you have the convenient ability to create and manage your company email accounts right from within the administrative console. You can add and modify an unlimited number of email accounts. Each account can be modified to enable forwarding, email aliases and auto-reply.
Please Note: Only the primary contact for your account has permissions to use this feature. Other administrators will receive an "Access Denied" notification if they try to save changes.
Action Steps:
- Log in to the admin console of your website. (Note: Full admin permissions are required).
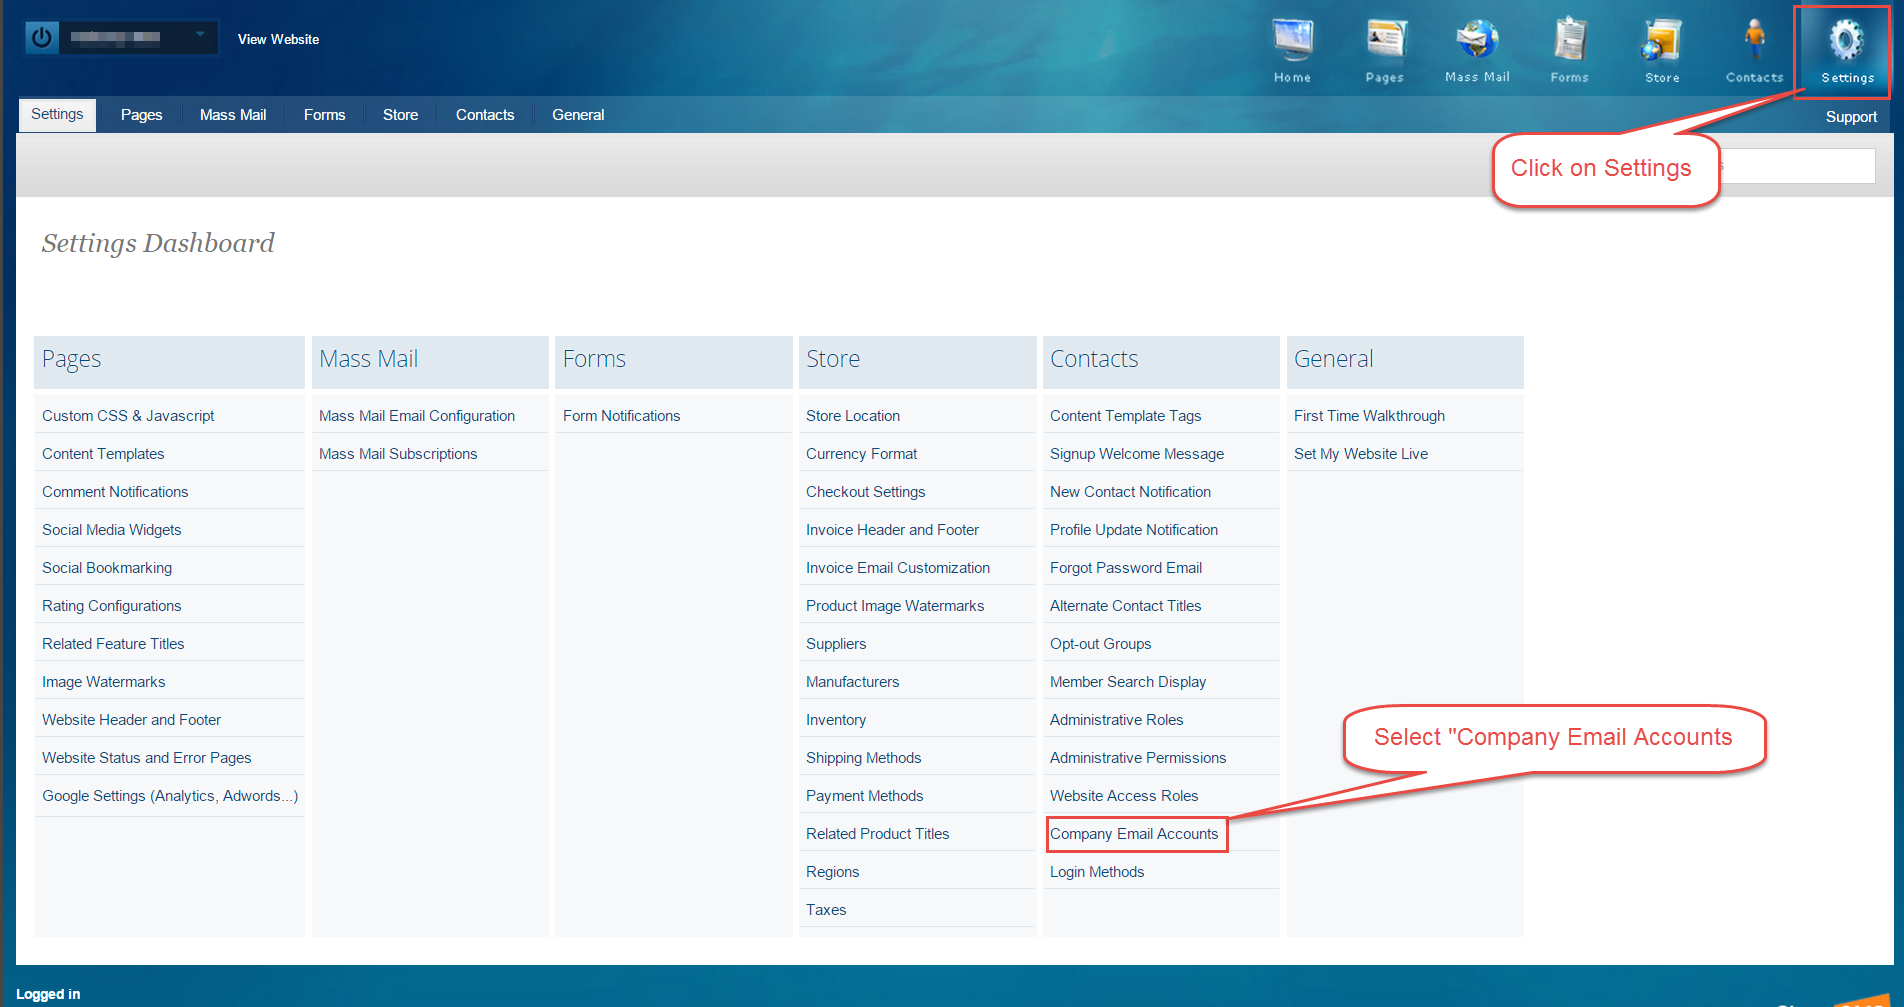
- Navigate to the settings area and select "Company Email Accounts"

- Click on "Add Email Account"

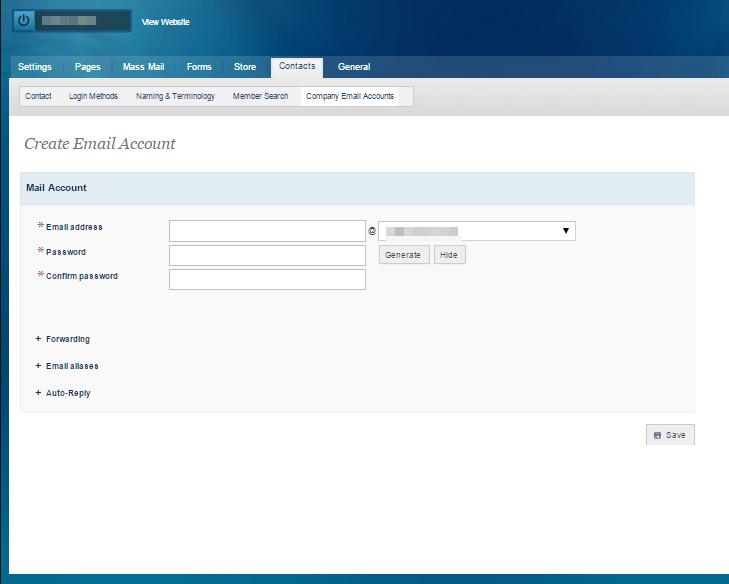
- The "Create Email Account" dialogue will be displayed.

- Create Email Account

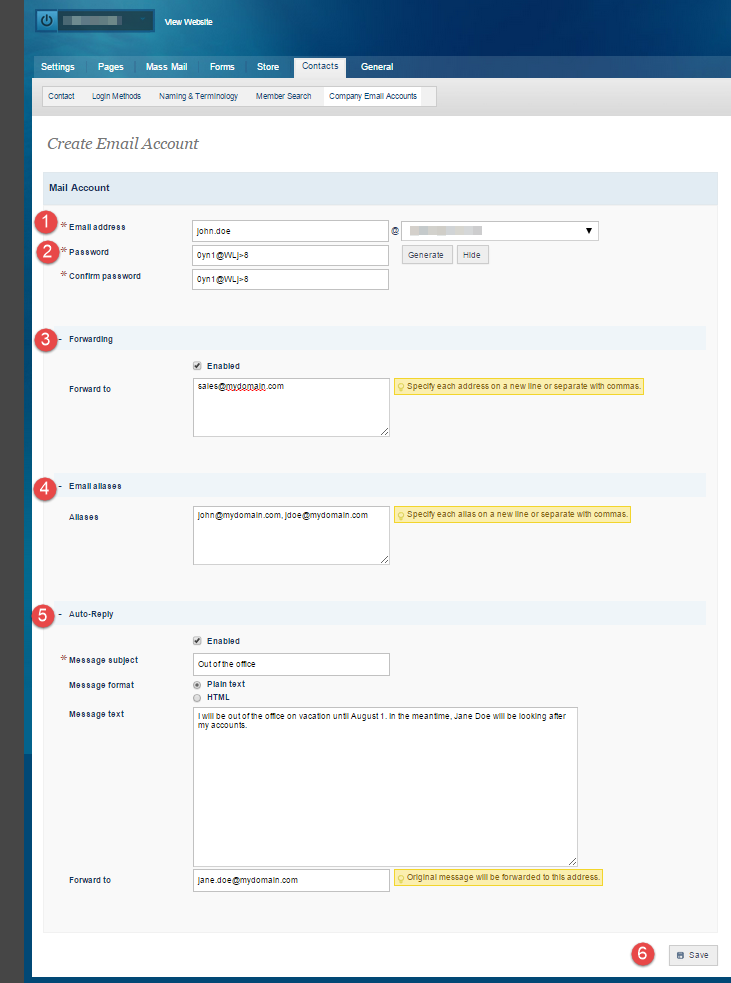
- Enter the email address. Your domain name will be set by default after the "@" symbol.
- Enter and confirm a password. Optionally, you can automatically "Generate" a password. Click on "Show" to display the pass word that was generated.
- To enable "Forwarding", click on the plus (+) sign on the left of the word Forwarding. Click on the "Enable" checkbox. Enter email addresses to which you want to forward to. Separate each address with a comma.
- To add email aliases, click on the plus (+) sign to the left of Email aliases. Example: The email account name entered is john.doe@mydomain.com. Additional aliases might include john@mydomain.com, jdoe@mydomain.com, etc.
- Auto-reply will automatically send a reply to all emails sent to this account as long as it is enabled. To enable auto-reply for this email account, click on the plus (+) sign to the left of Auto-Reply. Click on the "Enable" checkbox. Enter the message subject such as "Out of the office". Choose whether to send message as "plain text" or "HTML". Enter the body of the message to be displayed. For example, you might want to let people know you are on vacation, when you will return and who will be looking after things while you are away. Optionally add an address for received emails to be sent to while auto-reply is enabled.
- Click "Save" to complete.
Note: Email account holders can also manage their Auto-reply and Forwarding settings from within WebMail.
Thanks

Questions?